

by Doc – Owner, Founder, Can’t Take Credit for A Lot Of These Builds But Doesn’t Know Who Should
Table of Contents
Please also reference the tier list on this page for more builds that are specific to 6-star offline Tera raiding. Many of those builds are not listed here because this page is for a more casual audience that is new to Tera Raiding or doesn’t understand how to make quality builds.
These builds are targeted to a beginner to intermediate audience, so let’s assume that you don’t have an encyclopedic knowledge of the moves that each Tera Raid Pokemon has available to it, and we’ll instead assume that a Pokemon will at least have STAB moves available to it. That is, a Psychic/Flying type will have at least Psychic and Flying-type attacks. Bear in mind that most Pokemon have non-STAB moves in their Tera Raid movesets as well.
Click to open the Drop-Down Menu
- Table of Contents
- Bare Minimum Requirements of EVERY Tera Raid Build
- Bellibolt
- Annihilape
- Gholdengo
- Koraidon
- Miraidon
- Armarouge
- Ceruledge
- Iron Hands
- Zacian
- Zamazenta
- Kyogre
- Azumarill
- Enamorus – Therian
- Enamorus – Incarnate
- Slowbro
- Slither Wing
- Legends: Arceus Ursaluna
- Tinkaton
- Suicune
- Giratina
- Lock and Load Mewtwo
- “Play It By Ear” Mew
- “Pretend I’m Bellibolt” Mew
- Ogerpon (Grass-type)
- Terapagos
- Pecharunt
- Umbreon
- Blissey
- Non-obvious Tera Raid mechanics.
- Tera Shield damage reduction.
- Two-Way Typing Strategy
- How to Construct a Raid Pokemon Build
- When Is It a Good Idea to Use the Stellar Tera Type?
- Is the Speed stat important?
- Generally Useful Moves to Consider for Empty Slots
- Held Berries and Damage Calculation
- The Timing of The Stat Wipe and Tera Shield
- How to Beat the Stat Wipe
- Benefits to Offline Raids
- The Role of Status Effects
- Compensating for Bad Online Teammates
After reading through the builds on top, please scroll waaaay down to the “Tera Raid Nuggets That Are Vital to Know” portion of this article to improve your Tera Raid strategy. Tera Raids are hard without knowing the strategies. It’s very important that you have a deeper understanding of Tera Raid strategy so you can avoid being the “bad teammate” that wipes out the raid for everyone else.
Bare Minimum Requirements of EVERY Tera Raid Build
- Level 100
- Maximum IVs (use Hyper Training in Montenevera!)
- Maximum EV training
- Appropriate held item
- Proper Tera Type
It is basically never successful to bring anything less than this to an online 5, 6 or 7-Star Tera Raid. If you want to go online and do Tera Raids but don’t have fully trained Pokemon, don’t bother: going online with anything less than this bare minimum will result in losing your Tera Raids by constantly dying, and bringing down everyone else who went in with you. The 6 and 7-star raids are designed to be hard, so subpar Pokemon will always lose. Bring fully trained Pokemon.
Generally Great Tera Raid Builds – Base Game + HOME-only Pokemon
These instructions do not apply to specific 7-star raids. 7-star raids are often engineered so that only specific builds can consistently beat them. While some of these builds have succeeded against 7-star raids in the past (especially Bellibolt), nothing beats a coordinated, smart team of raiders.
The following raiders in the “Generally Great Tera Raid Builds” are the raiders I personally use, in decreasing order of usefulness/utility. Bellibolt is of course the most useful. The Mew and DLC sections after this are not sorted in order of usefulness.
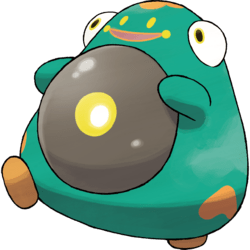
Bellibolt
Bellibolt @ Metronome
Ability: Electromorphosis
Tera Type: Electric
EVs: 252 Sp. Atk/ Remainder split between Defense and Sp. Defense
Nature: Modest
Moveset:
- Acid Spray
- Parabolic Charge
- Electric Terrain
- Charge
Thunder Wave, Chilling Water, Reflect or Light Screen are sometimes more useful than Charge – the real benefit of Charge is the one-stage gain of Sp. Def, because Electromorphosis will typically charge the attack for you. Thunder Wave is useful when gambling for setup time in early rounds, and Chilling Water is useful when buying yourself time before getting KOed.
Bolded moves should have their PP maxed out.
Smash Bros Brawl had Meta Knight. Generation 1 of Pokemon had Mewtwo. Old School Runescape has the Twisted Bow. Scarlet and Violet Tera Raids have Bellibolt.
Bellibolt is your go-to raider for any situation where:
- The Tera Type is not Ground-type
- The Tera Type does not resist Electric moves (Electric, Grass and Dragon resist Electric)
- and the Raid Pokemon itself is not a Ground type.
Its only real weakness is the handful of Tera Raiders that focus on inflicting status problems, but that’s typically just the Sleep status, and Electric Terrain prevents that.
Strategy 1:
Immediately and exclusively use Parabolic Charge. Terastallize as soon as possible. Parabolic Charge will heal you faster than you can be damaged so long as you aren’t fighting a Raid Pokemon matching the description in the previous paragraph, or are not significantly debuffed.
Strategy 1 is more appropriate when doing an online Tera Raid. This works with minimal difficulty on most Tera Raids, but tends to get stonewalled in some 6-star raids that inflict status problems. Bellibolt is a very useful support when all your teammates are running Belly Drum Iron Hands or Miraidon, so consider using Electric Terrain when you see someone else on your team running that set.
Strategy 2:
- Turn 1 + 2: Acid Spray
- Turn 3: Electric Terrain
- Turn 4: Charge (if needed)
- Turn 5-End of Raid: Parabolic Charge
Strategy 2 is more appropriate for an offline solo Tera Raid where you can’t predict when your NPC teammates will attack, or for 5-star Tera Raids and lower. The Acid Sprays lower the opponent’s Special Defense so a teammate can hit harder with an attack they were already planning on using. Electric Terrain provides a 5-turn boost to everyone’s Electric-type moves and prevents sleep. Charge increases the power of your next Electric-type attack and has the potential to raise your Special Defense. If you get to Turn 5 and haven’t defeated the Tera Raid boss, all of these multipliers will stack and allow you to line up a very powerful hit. That powerful hit will cause the Tera Raid boss to raise his Tera Shield, and you’ll have accrued the 3 charges needed for your Tera Orb to fill. On Turn 6 you can Terastallize (if not, keep using Parabolic Charge and Terastallize as early as possible) to do maximum damage through the shield.
Do not stop using Parabolic Charge once you have started using it. Metronome will reset your boost if you use a non-cheer move.
Both Bellibolt strategies are pretty good, and the differences between them are minimal. Don’t fret over which one to use online v. offline – so long as you understand how it operates and how much time you have to set up, you can make the appropriate decisions on the fly.
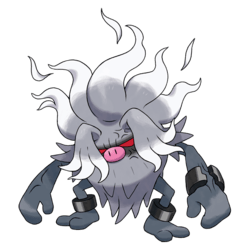
Annihilape
Annihilape @ Shell Bell
Ability: Defiant (Hidden Ability)
Tera Type: Fighting or Ghost, whichever is preferred
EVs: 252 HP/ 252 Atk/ 4 Def
Nature: Adamant
Moveset:
- Bulk Up
- Screech
- Rage Fist
- Drain Punch
Bolded moves should have their PP maxed out.
Strategy:
Annihilape functions as a physical Ghost or Fighting attacker who heals himself with high Rage Fist damage plus Shell Bell and/or his lower damage Drain Punch. You should not use him against any Tera type that isn’t weak to either Ghost or Fighting or whose Tera Pokemon is super effective against Ghost or Fighting.
Annihilape is a very “Play-it-by-Ear” type of Raid Pokemon, so there is no “right” way to play him. I typically start battles like so:
- Turn 1: Bulk Up
- Turn 2: Screech
- Turn 3: Rage Fist or Drain Punch
You may find that a specific Tera Raid gives you a few turns to set up some Bulk Ups or Screeches, or that your Tera Raid team is aggressive enough that you can simply cheer and Screech while they do the heavy lifting. That’s fine. The key to playing a good Annihilape isn’t going for the one-hit Rage Fist, as Gholdengo and other raiders can do that just fine. The key to a good Annihilape is understanding the situation you’re in and how to avoid dying.
I keep my Annihilape build as Tera Fighting because Rage Fist will gradually build up to maximum Base Power by the midpoint of the match, but I sometimes need that extra HP out of Drain Punch. If you’re in a situation where you have to decide between a Tera-boosted Drain Punch and a non-Tera-boosted Rage Fist, remember that both will give you HP from Shell Bell – but only one will probably refill you to full health.
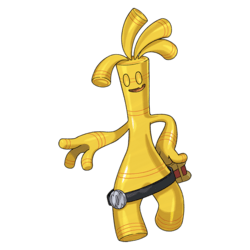
Gholdengo
Gholdengo @ Shell Bell
Ability: Good as Gold
Tera Type: Steel or Ghost, whichever is preferred (Steel is better if you have a Ghost Annihilape, but Make It Rain drops Sp. Atk by one stage for each use)
EVs: 252 Sp. Atk/ Remainder split between HP and Def
Nature: Impish
Moveset:
- Make It Rain
- Shadow Ball
- Nasty Plot
- Metal Sound
Bolded moves should have their PP maxed out.
Strategy:
Gholdengo is your one-shot Special Attacker glass cannon, a “Lock and Load” raider. He shouldn’t be used against any Tera Pokemon that can attack with Fire, Dark, Ghost or Ground moves as those are super effective against Gholdengo*. Gholdengo is also useful against Tera Raids who center around inflicting status moves, as his ability Good as Gold blocks them (except on the turn after the opponent has Terastallized and/or removed abilities).
*if you are in a situation where your opponent uses Fighting-type moves and your Tera is Steel, you will be toast if you Terastallize. Think carefully about bringing in Gholdengo in that situation.
Gholdengo is the best of the “lock and load” Pokemon. “Lock and load” builds are builds that are focused on buffing oneself and debuffing one’s opponent until a single hit, executed before the opponent raises their Tera Shield, KOs the opponent. It should be noted that one often doesn’t need to go through the entire buff and debuff process to one-hit KO the opponent. Only use as many buffs as will likely be necessary to achieve victory.
This is a typical “lock and load” raid for Gholdengo:
- Turn 1, 3, 5: Metal Sound*
- Turn 2, 4, 6: Nasty Plot*
- Turn 7: Make It Rain or Shadow Ball, whichever will do more damage
*Raiders will often remove their own negative effects or remove your beneficial ones. Most raiders can be defeated in two, not three debuffs of each kind, so don’t overdo it! It’s better to take the shot after two debuffs of each than to risk a stat reset before you get to three.
If Gholdengo drops the hammer with Make It Rain or Shadow Ball and doesn’t score a KO, all is not lost. He has certainly fully healed himself with Shell Bell, and after the Tera shield goes up and his stats are lowered Gholdengo can easily employ Nasty Plot to raise his own stats again, and continue to self-heal while chipping away at the shield with increased Special Attack. Gholdengo should not go for another one-hit KO, as he will likely be short on time before the Tera raid monster wipes his stat boosts or causes some other kind of unplanned havoc.
Gholdengo’s “Good as Gold” ability also grants him a completely unique benefit that to my knowledge no other Pokemon has: the opponent AI doesn’t incorporate it into its decision-making. Conkeldurr raids are a good example of this. The Conkeldurr AI has a condition that each opponent be inflicted with Scary Face before attacking them. Gholdengo is immune to Scary Face due to his ability, but the AI doesn’t take his ability into consideration. Conkeldurr’s AI will repeatedly spam Scary Face and do nothing else until his Tera Shield goes up and he removes Gholdengo’s ability. This leaves Gholdengo completely free to set up his one-hit KO so long as his teammates don’t activate the Tera Shield. A limited number of AI have this issue, but when you encounter on that does, take note: it will be very easy to beat.
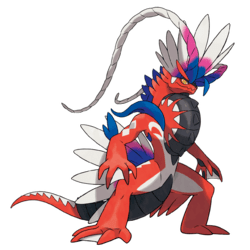
Koraidon
Koraidon @ Heat Rock (Shell Bell is helpful, but you’ll end up using Drain Punch either way)
Ability: Orichalcum Pulse
Tera Type: Fighting
EVs: 252 HP/ 252 Atk / 4 Def
Nature: Adamant
Moveset:
- Bulk Up (Swords Dance is another popular choice, but Bulk Up’s Defense boost protects Koraidon against unforeseen super effective against attacks)
- Collision Course
- Drain Punch
- Screech
Bolded moves should have their PP maxed out.
Strategy:
Koraidon is another “play it by ear” physical attacker requiring one to read the battle more than most other raiders. Koraidon should never be used against a Tera Pokemon that is super effective against Dragon or Fighting (that is, Flying, Psychic, Ice, Dragon and absolutely Fairy type). It should be noted that Koraidon resists Rock, Bug, Fire, Water, Grass, Electric and Dark attacks, so he can be a functional attacker even when dealing neutral damage. If you don’t know who to choose for a raid and it looks like none of his weaknesses are present, Koraidon is a good choice.
Koraidon is one of few Pokemon that can be either a lifestealer with Drain Punch or an all-out offense who regains his HP with Shell Bell. I encourage Heat Rock over Shell Bell because he can adequately heal himself against most Tera Raid opponents with Drain Punch spam, and opt for Collision Course when he has enough HP that he likely can’t be 2-hit KOed.
Koraidon fights typically begin as such, and then have to be “played by ear”:
- Turn 1: Bulk Up
- Turn 2: Screech
- Turn 3-4: Drain Punch
- After stat reset: another Bulk Up or two
If Koraidon chooses to run the Shell Bell option, he is far more precarious in the opening rounds, as he does not yet have the damage output to heal himself. He is also very vulnerable after the mid-raid stat wipe, as he will no longer have the defense boosts from Bulk Up to buy him time to heal. Koraidon effectively must rely on an 8 PP Collision Course to keep him healthy, or alternate with Drain Punch for extra health regeneration. If opting for the Shell Bell route, Koraidon should run Swords Dance instead of Bulk Up.
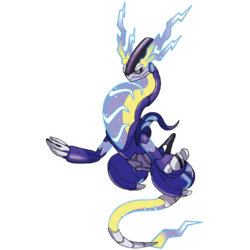
Miraidon
Miraidon @ Life Orb (Shell Bell is another viable option, but greatly reduces the likelihood that one will one-hit KO the opponent)
Ability: Hadron Engine
Tera Type: Electric
EVs: 252 Sp. Atk/ 252 Def/ 4 HP
Nature: Modest
Moveset:
- Metal Sound
- Charge
- Electro Drift
- Calm Mind
Strategy:
Miraidon is another “Lock and load” special attacker Pokemon like Gholdengo. Miraidon should never be brought against a Tera Pokemon that is a type that would be super effective against Miraidon (that is, the Ground, Ice, Dragon and Fairy types). Where Koraidon is a Pokemon reliant on the in-the-moment decision-making of the trainer, Miraidon is reliant on a long initial setup for a one-hit KO.
Miraidon’s strategy is typically as follows:
- Turn 1: Calm Mind
- Turn 2-3: Metal Sound
- Turn 4: Charge
- Turn 5: Electro Drift
- Turn 6: Heal Cheer
This strategy does not maximize the buffs and debuffs available to Miraidon, but it does maximize the likelihood that Miraidon will survive to Turn 5 to drop the hammer with Electro Drift. If the Electro Drift didn’t one-hit KO the Tera Raid opponent, the opponent will likely put up their shield and use a stat wipe, reverting all your progress. Miraidon will also take damage from the use of the Life Orb, so if he hasn’t already died, he’s likely about to. A Heal Cheer will keep you from death.
Miraidon is vastly more effective online instead of with the offline NPCs. Online players often keep an eye out for timely Heal Cheers and needed support moves, so you may find yourself fully healed after your own cheer and a stranger’s!
Strategy 1.5:
Miraidon can instead pack Parabolic Charge, which will not one-hit KO the opponent but will allow Miraidon to survive if the one-hit KO fails. This isn’t as viable as going for the Electro Drift build, and I wouldn’t spend my time on this build if I had access to a typical Bellibolt build.
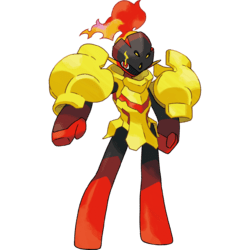
Armarouge
Armarouge @ Shell Bell
Ability: Flash Fire
Tera Type: Fire or Psychic (depending on preferred type of build)
EVs: 252 Sp. Atk/ 252 HP/ 4 Def
Nature: Modest
Fire Attack Build
Moveset:
- Mystical Fire (Stored Power builds exist for Armarouge but are generally inferior to Slowbro’s Stored Power build)
- Calm Mind
- Acid Spray
- Taunt
Bolded moves should have their PP maxed out.
Strategy:
Armarouge is superior to Ceruledge in group raids, but inferior to Ceruledge in solo raids due to Ceruledge’s ability to self-heal better than Armarouge.
Armarouge is a special lifesteal attacker. Armarouge, like Koraidon, is a “Play it by Ear” raider in many but not all cases. Armarouge should never be brought against a Raid Pokemon who is a type that is super effective against Fire or Psychic types (that is, Ground, Water, Rock, Dark, Ghost – Bug is permissible because Fire covers Psychic’s weakness), or against a Tera Type that is not weak to Fire. There’s… not that many uses for Armarouge, but there’s also not many good Fire-type raiders.
Armarouge’s strategy typically begins the same way:
- Turn 1: Calm Mind or Taunt
- Turn 2: Calm Mind
- Turn 3: Acid Spray
- Turn 4: Mystical Fire
The remainder of the raid should be played by ear. Armarouge should use at least one Calm Mind after the mid-raid stat wipe, and spam Mystical Fire to self-heal.
Armarouge has the option to “stack” buffs and debuffs to attempt a one-hit KO with Mystical Fire (or Stored Power, though that is inferior). This requires a minimum of 4 turns at the beginning of the raid to use two Calm Minds and two Acid Sprays, but Armarouge runs the risk of winding the timer down low enough that a stat wipe will still occur. Use with caution.
Psychic Attack Build
Moveset:
- Expanding Force
- Psychic Terrain
- Calm Mind
- Acid Spray
Bolded moves should have their PP maxed out.
Strategy:
Armarouge is superior to Ceruledge in group raids, but inferior to Ceruledge in solo raids due to Ceruledge’s ability to self-heal better than Armarouge. Psychic Armarouge is redundant with many of the other builds listed on this page.
Armarouge is a special lifesteal attacker. Armarouge, like Koraidon, is a “Play it by Ear” raider in many but not all cases. Armarouge should never be brought against a Raid Pokemon who is a type that is super effective against Fire or Psychic types (that is, Ground, Water, Rock, Dark, Ghost – Bug is sometimes permissible because Fire covers Psychic’s weakness until Armarouge Terastallizes), or against a Tera Type that is not weak to Psychic.
Armarouge’s Psychic build revolves around stacking Psychic Terrain, Expanding Force and if possible a Calm Mind or Acid Spray to deliver massive amounts of damage. Psychic Armarouge should be played as follows:
- Turn 1: Acid Spray or Calm Mind (Acid Spray is better if playing online, Calm Mind is better if you’re more concerned about survivability)
- Turn 2: Psychic Terrain
- Turn 3: Expanding Force
The good news is that Psychic Terrain doesn’t get removed with any mid-raid stat wipes, so you can keep blasting without interruption. The bad news is that if Expanding Force is used without the boost from Psychic Terrain it loses a seriously large amount of damage output. Keeping Psychic Terrain up is vital for Psychic Armarouge.
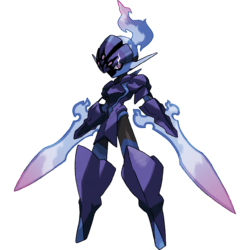
Ceruledge
Ceruledge @ Big Root (Shell Bell would return slightly less HP for each use of Bitter Blade. Metronome is also viable in Strategy 1.5)
Ability: Flash Fire
Tera Type: Fire
EVs: 252 Atk/ 252 Def/ 4 HP
Nature: Hardy
Moveset:
- Bitter Blade
- Swords Dance
- Bulk Up
- Taunt/Sunny Day, depending on opponent
Bolded moves should have their PP maxed out.
Strategy:
Ceruledge is superior to Armarouge in solo raids, but inferior in group raids due to Armarouge’s ability to lower the opponent’s Sp. Def.
Ceruledge is a lifesteal physical type attacker, and one of few whose main and best attack is also an HP-refiller. Ceruledge, like Koraidon, requires one to “play it by ear” in many but not all cases, and is rather frail. Ceruledge should never be brought against a Tera Pokemon who is super effective against Ceruledge (that is, Ghost, Dark, Rock, Ground or Water type opponents), and should also never be brought against any Tera Type that isn’t weak to Fire (that is, anything not Steel, Grass, Ice or Bug). There’s… not that many great uses for Ceruledge, but there’s also not many great Fire-type raiders.
Ceruledge actually thrives against opponent Fire-type Pokemon thanks to his Flash Fire ability, so long as their Tera type does not resist Fire. The best the opponent can do, assuming they have no super effective attacks, is to attack him with neutral damage that can be easily healed.
Ceruledge’s strategy typically begins the same way:
- Turn 1: Bulk Up
- Turn 2: Swords Dance
- Turn 3: Sunny Day, if applicable
- Turn 4: Bitter Blade (Turn 3 if no Sunny Day)
Ceruledge does have access to Taunt, which prevents the opponent Pokemon from raising its own stats. While many 5-star Tera Raid opponents don’t raise their own stats to a significant degree, some 6-star Tera Raid opponents do. If you happen to know from experience that the Raid is scripted to include self-stat boosts, Taunt can prevent those from happening. The downside is that instead of raising their stats for the long term, the opponent is attacking you in the short term. The temporary increase in pressure sometimes causes a raid to wipe.
Strategy 1.5:
Much like Bellibolt and his Parabolic Charge, if one were to set up your Ceruledge with the previously described strategy, Ceruledge could choose to endlessly spam Bitter Blade until the opponent died without bothering to rebuild stats after the mid-raid stat wipe. Bitter Blade heals for 50% of the damage dealt. In this scenario, if one were to employ Big Root, Ceruledge would heal back an extra 30%, making for a total heal of 65% of the damage dealt. However, if Ceruledge were to employ Metronome instead of Big Root, the damage boost from Metronome would accumulate such that after three consecutive Bitter Blades Ceruledge would be 1. Doing more damage and 2. Doing so much more damage that Bitter Blade’s self-healing would outpace the healing boost from Big Root. Metronome is technically riskier because the chain is reset after being KOed, but the difference between the two is rather small until five consecutive Bitter Blades are used.
Therefore, the decision to choose between Big Root and Metronome is up to the probable length of the raid. Longer raids should use Metronome, and shorter ones should use Big Root.
Iron Hands
Iron Hands @ Booster Energy (Shell Bell is optional, but Drain Punch covers the need for self-healing)
Ability: Quark Drive
Tera Type: Electric or Fighting, whichever is preferred (Fighting has better synergy with Drain Punch and better type coverage, Electric has better synergy with the Booster Energy and fewer resistances)
EVs: 252 Atk/252 Sp. Def/ 4 HP (Consider splitting Sp. Def between Sp. Def and Def if you find yourself dying on Turn 1 frequently)
Nature: Adamant
Moveset:
- Belly Drum
- Close Combat
- Thunder Punch
- Drain Punch
Bolded moves should have their PP maxed out.
Strategy:
Iron Hands should not be used against any Tera Type that is not weak to Electric or Fighting. Neutral damage against those types is acceptable, but there’s typically a raider that can handle that type combination more effectively than Iron Hands. Iron Hands also should not be used against any Tera Pokemon that has a typing that is super effective against Fighting or Electric (that is, Fairy, Flying, Psychic, Ground).
Like Gholdengo, Iron Hands is in the “Lock and load” category of Tera raiders with his Belly Drum. Belly Drum loadouts are the easiest builds for casual Tera raiders to make and understand, and Iron Hands is king among them as a physical attacker. The Belly Drum strategy is very straightforward:
- Turn 1: Belly Drum to raise to +6 Atk boost
- Turn 2: Attack
The problem with Belly Drum is that it comes at the cost of losing half your HP immediately. As a result, Iron Hands runs the risk of being attacked on Turn 1 and KOed before he can regain his HP with Shell Bell. There is no workaround for this besides a teammate who will use a Defense cheer. If you’re playing offline, your NPC teammates will always use a Defense cheer on Turn 1. I tend to consider Iron Hands to be more viable offline than online as a result.
Some Iron Hands run Wild Charge over Thunder Punch for the increased Electric damage. That’s a great plan!… until it fails to one-hit KO the opponent. Wild Charge is an even riskier loadout than the already-risky Belly Drum because of the immense recoil damage that will be taken, so I don’t encourage Wild Charge.
The same goes for Supercell Slam, which basically functions as a double-or-nothing gamble with every single use. Because Belly Drum costs 1/2 your HP, and Supercell Slam deals another 1/2 your HP in recoil if it fails to connect (which it does 5% of the time), there’s surprisingly high odds that Iron Hands running Supercell Slam will get KOed at least once during each raid. You can remove the possibility of recoil by equipping a Wide Lens, but that removes the option to self-heal between turns with Shell Bell which is key to keeping Belly Drum users alive, and removes the boost from Booster Energy, which defeats the purpose of running Supercell Slam.
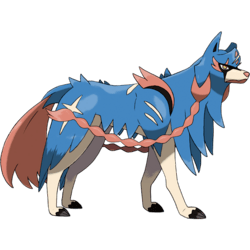
Zacian
Zacian @ Shell Bell (Crowned Zacian isn’t better than Shell Bell for Tera Raids as far as I can tell)
Ability: Intrepid Sword
Tera Type: Fairy
EVs: 252 Atk/ 128 Def/ 128 Sp. Def
Nature: Adamant
Moveset:
- Play Rough
- Swords Dance
- Noble Road
- Misty Terrain
Bolded moves should have their PP maxed out.
Strategy:
Zacian is a Fairy-type “Play It By Ear” physical attacker who self-heals with Shell Bell. Zacian should never be brought against a Raid Pokemon who is Poison or Steel-type, or whose Tera Type resists Fairy (that is, Fire, Poison and Steel). Zacian succeeds slowly but consistently against Tera Types that are neutral to Fairy.
You shouldn’t be surprised to see Zacian here considering his position in Gen 8’s competitive play. Zacian is incredibly tanky when not facing an opponent with Poison or Steel attacks, and his ability lends itself to hitting hard right out of the gate. He’s not the fastest raider, but he’s remarkably more consistent than something like Iron Hands or Koraidon. Zacian’s best raids typically start as:
- Turn 1: Noble Roar
- Turn 2: Swords Dance
- Turn 3: Swords Dance
- Turn 4: Misty Terrain (if preventing statuses is necessary)
- Turn 5: Play Rough
This is a pretty lengthy startup to a raid, so you might adjust it by scrapping a Swords Dance. At its base, the most important turns are the Noble Roar (which neuters the opponent’s ability to damage you) so as long as you get those in you should be okay. Zacian is slow and steady.
Zacian’s only real flaw is his reliance on the inconsistent Play Rough (which we’ll assume you’re not using 16 times in a raid). You have a 10% chance to miss it on each turn, and there’s a 1% chance that you might miss it twice in a row. That’s a pretty consistent upside so long as you’re capable of mitigating the downside, and the EV loadout mitigates that downside well.

Zamazenta
Zamazenta @ Shell Bell (Crowned Zamazenta isn’t better than Shell Bell for Tera Raids as far as I can tell)
Ability: Dauntless Shield
Tera Type: Fighting
EVs: 252 Def/ 252 HP (investing in Sp. Def instead of HP is equally viable, but consider the Body Press boost you’ll get from your Defense stat)
Nature: Adamant
Moveset:
- Body Press
- Close Combat or Brick Break (Close Combat is far riskier, I personally use Brick Break)
- Iron Defense
- Coaching
Bolded moves should have their PP maxed out.
Strategy:
Zamazenta is a physical Fighting-type “Play It by Ear” attacker who self-heals with Shell Bell. Zamazenta should never be brought against an opponent whose typing is super effective against Fighting (that is, Flying, Psychic or Fairy). Zamazenta should be brought against Tera Types that are weak to Fighting (that is, Normal, Dark, Ice, Rock and Steel). Unlike Zacian, Zamazenta doesn’t perform well enough against Tera Types neutral to his typing to be worth bringing, so be sure to keep it to just those five types.
Zamazenta’s raid typically opens like so:
- Turn 1: Coaching
- Turn 2: Iron Defense
- Turn 3: Iron Defense
- Turn 4: Body Press or Brick Break (Brick Break is only applicable if busting screens)
Zamazenta’s strategy is unique in Pokemon Tera Raids in that his best move, Body Press, uses his Defense stat instead of his Attack stat to calculate damage dealt. Having an Attack EV investment for Zamazenta is only useful for Close Combat/Brick Break, but you won’t be relying on them much besides emergency self-healing. To that end, Zamazenta maxes out his Defense stat by the end of Turn 3, and he can then blast through the opponent with a Body Press.
Zamazenta doesn’t do a lot of damage even with all the stat investments, but that doesn’t matter. So long as he doesn’t run out of PP, doesn’t die and boosts his Defense after the mid-raid stat wipe he’ll be okay. Zamazenta is slow and steady.
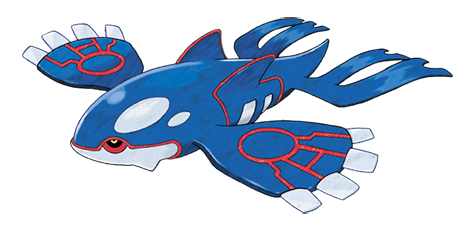
Kyogre
Kyogre @ Shell Bell
Ability: Drizzle
Tera Type: Water
EVs: 252 Sp. Atk/128 Sp. Def/128 Def
Nature: Modest
Moveset:
- Water Spout
- Surf (Origin Pulse is also an option, but too risky for my taste)
- Calm Mind
- Rain Dance
Bolded moves should have their PP maxed out.
Strategy:
Kyogre is a bulky “Play it by Ear” Water-type special attacker who is very situational in what decisions he can make. Kyogre should not be used against Tera Types that are resistant to Water attacks, and should not be used against any Tera Pokemon who is super effective against Water (that is, Grass and Electric). He is extremely tanky, which is why you’ll often see people recommending Kyogre for most raids that require a Water type. Kyogre is also a bit more “Play it by Ear” than other “Play it be Ear” raiders because of the uniqueness of his moveset, abilities and immense bulk which all give him significant discretion in how he plays. Kyogre has several Special Attack options available, and the correct choice will depend significantly on the situation. Here’s what we’re looking at:
- Water Spout: An HP-dependent attack with 150 base power at 100% HP, but drops to around 90 base power when you’re at 2/3 HP. Better than Surf until you hit about 70% HP, roughly.
- Origin Pulse: 110 base power, but has 85% accuracy, meaning it fails about 1 in 7 times.
- Surf: 90 base power with 100% accuracy and no other side effects. Very reliable.
While significantly lower in base power than Water Spout (at full HP) or Origin Pulse, Surf has 100% accuracy with no drawbacks, making it extremely reliable. The reliability of Surf is critical – Tera Raids typically go wrong because the “1 in 7” move that you thought would almost never miss suddenly misses multiple times in a row, and that’s just your bad luck.
For the rest of Kyogre’s moveset, he has the extremely important Calm Mind, which boosts your Special Attack output by 50% for each use, and also raises your Special Defense (although that’s not as important because Kyogre is so tanky). Kyogre also has Rain Dance, which can serve as a replacement to his Drizzle ability should your rain run out, although one should not get too reliant on the rain boost. The trade-off between Calm Mind and Rain Dance is that while they’re the same boost to his Water-type attacks, Calm Mind stat boosts get wiped when the Raid Boss decides to wipe them, and Rain Dance sticks around for five turns unless the Raid Boss or a teammate sets their own weather. If you’re keeping track of how many stat wipes you’ve been hit with and what weather the opponent is setting (if any), then you can make your decision based on that information.
Kyogre is a Pokémon that can give himself a rain boost to his Water-type attacks, and who, in order to maximize his damage output, needs to stay at full health. The plan to accomplish that is:
- Turn 1-2: Drop one or two Calm Minds, preferably three if you’re not super effective against the Tera type
- Turn 3 onwards: Use Surf to deal damage and heal with Shell Bell, maybe drop a Rain Dance
- Continue until they put up the Tera Shield and you’re able to Terastallize
You want to Terastallize as soon as possible since you don’t plan on fainting and want to maximize damage output with the double STAB bonus. After the shield has been put up, keep hitting with Surf or Water Spout if your HP is high enough. As usual, once the opponent wipes your stats mid-raid, drop one or two Calm Minds, then decide whether to use Surf or Water Spout based on your HP. Once you’re below about 70-80% HP, stick with Surf to heal back up with Shell Bell. When you’re at higher HP (above 80%), switch to Water Spout for maximum damage. Those are really the tricks of Kyogre, keeping your HP high enough to hit with Water Spouts instead of Surfs.
As always, if you’re in a worst-case scenario and about to faint, you have options regarding your cheer attacks: if you won’t survive the next hit, use a Heal Cheer. If you will survive the next hit, use a Defense Cheer. You use the Heal Cheer to get yourself out of the immediate tight spot in hopes that it gives you the 1 in 4 chance of fully healing you, and you use the Defense Cheer so that instead of being able to survive just the first hit, you may now survive the first and possibly the second hit, allowing you on the next turn to attack and regain HP sufficient to get yourself out of the hole.

Azumarill
Azumarill @ Shell Bell
Ability: Huge Power
Tera Type: Water (Fairy is another viable option, but Play Rough doesn’t benefit from Rain Dance)
EVs: 252 HP/ 252 Atk/ 4 Def
Nature: Mild/Adamant
Moveset:
- Belly Drum
- Rain Dance
- Aqua Tail
- Play Rough
Bolded moves should have their PP maxed out.
Strategy:
Azumarill is another “Lock and load” Belly Drum user. Azumarill runs the same risk that all Belly Drum users do – they can die immediately after using Belly Drum.
Azumarill should not be used against any Tera Pokemon that is not weak to its Tera type, and should not be used against any Tera Pokemon that is super effective against Water or Fairy (that is, Grass, Electric, Steel or Poison types). Azumarill is not a one-size-fits-all Pokemon, and I have seen many online Tera raids completely wipe because someone brought a Belly Drum Azumarill when any other Pokemon on this list could have performed better. Think carefully before bringing Azumarill.
Azumarill has two strategies depending on his Tera type:
Water Strategy:
- Turn 1: Rain Dance
- Turn 2: Belly Drum
- Turn 3: Aqua Tail
The Water strategy is generally more successful due to the boost from Rain Dance.
Fairy Strategy:
- Turn 1: Belly Drum
- Turn 2: Play Rough
The Fairy strategy is functional but inferior to the Water strategy due to the lack of Rain Dance. It should be noted that both Aqua Tail and Play Rough are practically identical moves besides their typing (Play Rough has a chance to lower the opponent’s Attack stat, but that is typically removed by the opponent fairly quickly).
Enamorus – Therian
Enamorus @ Shell Bell
Ability: Overcoat
Tera Type: Fairy
EVs: 252 Sp. Atk/128 Def/128 Sp. Def
Nature: Modest
Moveset:
- Moonblast
- Draining Kiss
- Calm Mind
- Misty Terrain
Bolded moves should have their PP maxed out.
Strategy:
Enamorus – Therian is basically a “Play it by ear” special attacker who, like most Pokemon of her kind, lifesteals when it’s needed and does lots of damage when not. Enamorus should never be brought out against a Tera Pokemon who is super effective against Fairy or Flying types (that is, Steel, Poison, Electric, Ice or Rock types). Enamorus – Therian will use the Fairy type offensively, making her useful against Dark, Fighting and Dragon Tera types. If fighting an opponent likely to use Dragon-type attacks, Enamorus is a very good choice so long as no other types are present that would be super effective against Enamorus. Just don’t expect it to quickly kill the opponent, as most 6-star solo raids with Enamorus – Therian tend to go for at least 20+ turns.
Enamorus-Therian typically starts a match as follows:
- Turn 1: Calm Mind
- Turn 2-4: Draining Kiss
- Turn 5: Misty Terrain (if enough HP that Enamorus can survive well into the next turn)
- Turn 6: Terastallize and Moonblast until defeated
Enamorus’ Shell Bell and defensive EVs should keep her sufficiently healed in most circumstances, and Draining Kiss allows her to top off her HP in the beginning rounds. After Terastallization, Enamorus should have no problem staying healed up despite her low HP with high-powered Moonblasts and the healing from her Shell Bell.
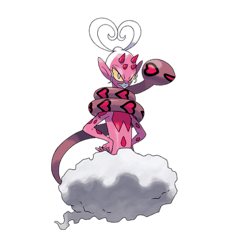
Enamorus – Incarnate
Enamorus @ Shell Bell
Ability: Contrary (Hidden Ability)
Tera Type: Stellar (Recall that Stellar Tera attacks only do 35% on the Tera Shield, so you’ll be more reliant on the Contrary attack boosts)
EVs: 252 Sp. Atk/ 128 Def/ 128 Sp. Def
Nature: Modest
Moveset:
- Tera Blast
- Healing Wish (just kidding)
- Draining Kiss
- Taunt
- Misty Terrain
Bolded moves should have their PP maxed out.
Strategy:
Enamorus – Incarnate is a lot like Enamorus – Therian in that she is a “Play it by ear” special attacker, but unlike Therian our Incarnate Enamorus has a plan. Enamorus should never be brought out against a Tera Pokemon who is super effective against Fairy or Flying types (that is, Steel, Poison, Electric, Ice or Rock types). If fighting an opponent likely to use Dragon-type attacks, Enamorus – Therian is a very good choice so long as no other types are present that would be super effective against Enamorus.
Enamorus – Incarnate typically plays as follows:
- Turn 1: Taunt
- Turn 2-4: Draining Kiss
- Turn 5: Misty Terrain
- Turn 6: Terastallize and rain Tera Blast hell
Unlike Therian, Incarnate’s strategy is to use her Contrary ability to boost her own Sp. Atk as she continues to use Tera Blast. Because Tera Blast receives double STAB and is guaranteed super effective when Stellar-Terastallized, Enamorus – Incarnate benefits more from a Stellar Tera than a Fairy Tera. Tera Blast only gets stronger as Enamorus uses it, so Enamorus’ only real concern after Terastallizing is making sure she soaks up as much HP as possible with Shell Bell by blasting Tera Blast over and over.
It’s vitally important that Enamorus – Incarnate does not lose her Tera. If she KOs, she is completely wiped for lack of ability to re-raise her stats. Survivability and a conservative playstyle is key to ensure that Enamorus – Incarnate can get off enough Tera Blasts to KO the opponent. If Tera Blast runs out of PP, she will still be able to spam Draining Kiss with a maxed-out attack stat to win the raid.
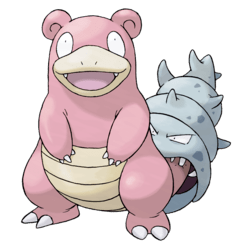
Slowbro
Slowbro @ Shell Bell (Life Orb is equally optional, but riskier in return for its greater reward)
Ability: Oblivious
Tera Type: Psychic
EVs: 252 Sp. Atk/ 252 Def/ 4 HP
Nature: Relaxed
Moveset:
- Iron Defense
- Nasty Plot
- Stored Power
- Slack Off
Bolded moves should have their PP maxed out.
Strategy:
Slowbro should never be brought out against a Tera Pokemon who would be super effective against Water or Psychic types (that is, Grass, Electric, Dark, Ghost, and Bug types). Slowbro functions well against Tera Types weak to Psychic (Fighting and Poison) and against Tera Types that don’t resist Psychic.
Slowbro is one of the more unique raid builds. Slowbro is a “lock and load” special attacker Pokemon, but instead of using buffs and debuffs to one-hit KO the opponent he relies on jacking up his own stats so high that a single Stored Power gets the job done. Stored Power goes up by +20 Base Power for each stat that has been raised, and Slowbro’s moveset is full of moves that raise two stats at a time, so…
Slowbro’s strategy looks like this:
- Turn 1: Iron Defense
- Turn 2: Nasty Plot
- Turn 3-6: Alternate Iron Defense and Nasty Plot, heal with Slack Off as needed
- Turn 7 (or whenever Defense and Sp. Atk are both at +6): Attack Cheer
- Turn 8: Stored Power
It should be noted that Attack Cheers stack on top of your existing bonuses, but aren’t included in the Stored Power calculation. An Attack Cheer would basically be like having a +6 Sp. Atk with an extra +50% or +100% cheer multiplier on top of your massive Stored Power.
You may run into a situation where your stats are wiped while you’re building them. Tough. You don’t have another choice but to start rebuilding them, and to instead drop a few smaller Stored Powers throughout the course of the raid. Because it’s unpredictable in online matches when your teammates will cause the opponent to raise his shield and wipe your stats, you should only employ Slowbro in the more predictable offline Tera Raids.
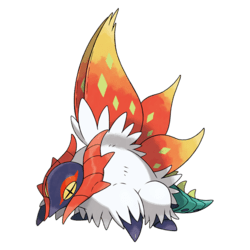
Slither Wing
Slither Wing @ Metronome
Ability: Protosynthesis
Tera Type: Bug
EVs: 252 Sp. Def/252 Def (128 Sp. Def/128 Def/252 Atk viable too, but riskier)
Nature: Adamant
Moveset:
- Leech Life
- Bulk Up
- Skitter Smack/Sunny Day (Skitter Smack to lower the opponent’s Sp. Atk stat when necessary, Sunny Day to pair with Morning Sun. I run Sunny Day/Morning Sun)
- Stun Spore/Morning Sun (Stun Spore to inflict paralysis, Morning Sun to replenish HP when weather is favorable)
Strategy:
Slither Wing is a physical lifestealing “Play it By Ear” Bug-type attacker. Slither Wing is frail, and as a result should never be used against a Pokemon whose type would be super effective against Bug or Fighting (that is, Flying, Fire, Psychic, Fairy and Rock). Slither Wing should be brought against any Tera Type that is weak to Bug (that is, Psychic, Dark and Grass). Most lifesteal attackers can perform reasonably well when doing neutral damage. Slither Wing is not one of them, as he needs the super-effective damage boost to assist in his self-healing.
Slither Wing occupies a weird place in a raid build lineup; he’s weak to many of the most common types, but is inherently super effective against Psychic and Grass, which are difficult to find top-level raiders for. If you’re trying to take down a Psychic or Grass raid and your Annihilape, Armarouge or Ceruledge is unusable due to a type weakness, Slither Wing is a useful alternative. Despite his frailness he is surprisingly useful, so long as the Tera Raid opponent doesn’t pack a Flying-type attack that will surely destroy him.
Slither Wing typically begins its raids as follows:
- Turn 1: Bulk Up
- Turn 2: Stun Spore
- Turn 3: Sunny Day
- Turn 4-End: Leech Life
- Use Morning Sun as needed to heal, but rely on your Leech Life self-healing once you’ve Terastallized so as not to interrupt the Metronome boost.
I generally recommend that people experiment with a raider before launching into 6-star raids with it, and Slither Wing is a shining example of this. Slither Wing is weird as a raider, but highly effective when correctly played.
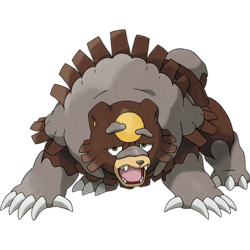
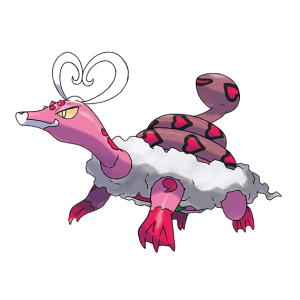
Legends: Arceus Ursaluna
Legends Arceus Ursaluna, not Bloodmoon Ursaluna
Ursaluna @ Shell Bell (Toxic Orb is a common but subpar choice for Ursaluna’s Guts ability – see below)
Tera Type: Ground (Normal is a common but subpar choice in Toxic Orb sets – see below)
EVs: 252 Atk/ 128 Def / 128 Sp. Def
Nature: Adamant
Moveset:
- Swords Dance
- Earthquake
- Bulk Up
- Drain Punch
Bolded moves should have their PP maxed out.
Strategy:
Ursaluna is best played as a physical “Play it by Ear” lifesteal attacker. He should never be used against Water, Grass, Ice and Fighting types, and should only be brought against opponents whose Tera Type is weak to Ground (that is, Rock, Steel, Poison, and Fire). Ursaluna should never be brought against a 6-star raid. Ursaluna has a pretty typical strategy: boost stats, hit hard and self-heal along the way. Ursaluna typically plays as follows:
- Turn 1: Bulk Up
- Turn 2: Swords Dance
- Turn 3: Earthquake or Drain Punch (if running low on HP, use Drain Punch)
Ursaluna has lots of popular raid loadouts on the internet, including Belly Drum Ursaluna and Toxic Orb + Facade Ursaluna. These loadouts aim to maximize Ursaluna’s massive Attack stat to aim for a near-OHKO scenario. What they gain in offensive potential they lose in survivability; those builds lack useful self-healing options besides the non-STAB Drain Punch or Shell Bell, and have the same issues that other Belly Drum builds do as described in the second section of this page. I spent several hours raiding with various Ursaluna loadouts I found online, and can safely say that I do not recommend Ursaluna in any 6-star raid, ever. Ursaluna lacks the damage output and bulk needed to adequately self-heal even with the above loadout, and I consider him terribly overrated as a raider.
This also applies to Bloodmoon Ursaluna, who is markedly worse.
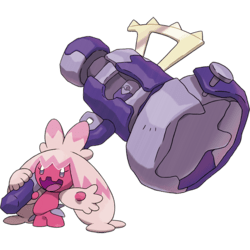
Tinkaton
Tinkaton @ Shell Bell
Tera Type: Steel (Stellar is also an option, but the extra STAB on Draining Kiss is far outweighed by the loss of the increased effectiveness of Gigaton Hammer on the Tera Shield)
EVs: 252 Atk / 128 Def / 128 Sp. Def
Nature: Adamant
Moveset:
- Gigaton Hammer
- Draining Kiss
- Swords Dance
- Thunder Wave/Baby-Doll Eyes (I personally use Baby-Doll Eyes)
Bolded moves should have their PP maxed out.
Strategy:
Tinkaton is best played as a Steel-type physical “Play It By Ear” attacker who self-heals with gargantuan damage from Gigaton Hammer and her Shell Bell. She should never be used against an opponent who has an attack that is super effective against Steel (that is, Fire, Ground or Fighting). She should only be brought against Raid Pokemon whose Tera Type is weak to Steel (that is, Ice, Rock and Fairy) or Raid Pokemon who are Poison or Dragon-type like Dragalge. Tinkaton should never be brought against a 6-star raid unless the Raid Pokemon is Poison or Dragon-type and also does not have a typing that is super effective against Steel. She’s basically really, really niche but uniquely suited because of her defensive typing.
Tinkaton typically starts a battle like so:
- Turn 1: Baby-Doll Eyes/Thunder Wave
- Turn 2: Swords Dance
- Turn 3: Draining Kiss
- Turn 4: Gigaton Hammer/Draining Kiss (up to your discretion: Draining Kiss is better to build Tera orb charge with, and to self-heal, but it does almost no damage)
- Continue alternating between Gigaton Hammers and Draining Kiss or Swords Dance as needed
Tinkaton is frail and weak, and her only saving grace is Gigaton Hammer and Swords Dance. Gigaton Hammer also can’t be used twice in a row, so Tinkaton has to use moves between Gigaton Hammers. Fortunately she has access to Draining Kiss and Swords Dance. Tinkaton can use Draining Kiss to heal herself or Swords Dance to double her Attack stat when not using Gigaton Hammer.
Tinkaton’s a pretty simple raider, but really not very good. I only use her in 5-star raids, and only when I’m feeling adventurous or when the Raid Pokemon matches the criteria above. There’s generally better options out there… unless you really like Tinkaton.
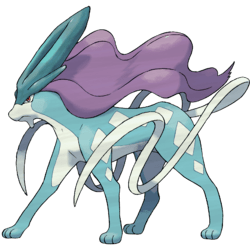
Suicune
Suicune @ Shell Bell
Ability: Pressure
Tera Type: Water
EVs: 252 Sp. Atk/128 Sp. Def/128 Def
Nature: Modest
Moveset:
- Surf
- Scald
- Calm Mind
- Rain Dance
Bolded moves should have their PP maxed out.
Strategy:
Suicune is a Water-type “Play it by Ear” special attacker who is less bulky and less strong variant of Kyogre. Suicune should never be used against a Tera Type that resists Water (that is, Water, Grass and Dragon) and should never be used against a Pokemon who is super effective against Water (that is, Grass and Electric).
Kyogre and Suicune are both Water types and have access to many of the same moves, however Kyogre’s moveset is better and allows for more situational decision making. The difference between the two of them is that Kyogre is best off running something like Water Spout, which has extreme upside potential, doing 150 base power attack at full health, whereas Suicune may only attack with Surf and Scald as his best reliable options.
While this is a noticeable downgrade from Kyogre, who has ridiculous Special Defense, Suicune’s defensive stats are still somewhat effective, so you won’t miss out on a lot of the bulk unless you’re getting hit super effectively. Where Suicune is lacking compared to Kyogre is that Kyogre simply has more damage upside and will take another turn or two to get KOed.
Suicune’s two Water-type attacks are going to be Surf and Scald. Surf is base power 90 with 100% accuracy, and Scald is base power 80 with 100% accuracy, and a 30% chance to inflict a burn status on the opponent. That burn will come in handy later – don’t forget about it.
Suicune’s other two moves are Calm Mind and Rain Dance, much like what we run with Kyogre. The basic idea is the same:
- Turn 1-3: Calm Mind multiple times
- Turn 4+: Start dropping Scalds until you get a burn, and then use regular Surf
Maintain rain if at all possible, but use your best judgment to decide whether that’s worth spending a turn on. Rain Dance only provides a 50% bonus to Water-type attacks, which does make a significant impact, especially considering you get the double STAB boost from having Terastallized Water type. But if the opponent raid boss is setting up Sandstorm or Snowscape, then it’s probably not worth spending the turn if that doesn’t hinder your ability to set rain.
As with all weather types, be aware that their Tera type may result in them receiving a boost from their weather setting, so you can still drop a Rain Dance if you want to interrupt perhaps a Snowscape defense boost to Ice types.
If your back is against the wall as Suicune, as always you have Defense and Heal Cheers, but in my experience, unless Suicune is getting hit by super effective attacks, he won’t really need them. Cheers generally are not a vital part of Suicune’s playstyle.
The burn on Scald is unique to Suicune’s strategy (compared to Kyogre), and it provides in effect a defense buff to Suicune. What actually happens is that burn, while it does slightly reduce the HP on the opponent Pokémon in a one-second animation that takes far too long if you ask me, more importantly it reduces the physical attack stat of the opponent Pokémon by half. Unfortunately for Suicune, not even Scald can inflict a burn status on a Fire-type Tera type opponent, but since you’re already super effective against that opponent, I don’t think you’ll need it.
As always, Suicune and just about every other raider runs Shell Bell for self-healing. You don’t need to worry about self-healing so long as you’re doing significant damage output.
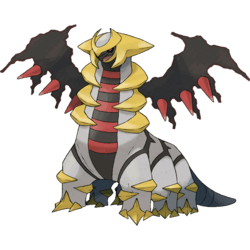
Giratina
Giratina-Altered @ Shell Bell
Ability: Pressure
Tera Type: Ghost
EVs: 252 Sp. Atk/128 Def/ 128 Sp. Def
Nature: Modest
Moveset:
- Shadow Ball
- Hex
- Calm Mind
- Will-O-Wisp
Bolded moves should have their PP maxed out.
Strategy:
Giratina-Altered Forme is a special “Play it by Ear” Ghost-type attacker. He should be used against Tera types that are weak to Ghost (that is, Psychic and Ghost) but never brought against a Pokemon who is super effective against Ghost (that is, Ghost and Dark). Giratina does not do enough damage to be useful against Tera types that he isn’t super effective against.
The strategy is really straightforward: you start the battle, use either Calm Mind or Hex as you see necessary (I recommend starting with Calm Mind), but each time you have an opening, hit a Will-O-Wisp. The reason you want to do this is obvious – Calm Mind is to boost your Special Attack and Special Defense, but you want to hit Will-O-Wisp because of Hex. Hex is 65 base power, but doubles to 130 base power when the target is already afflicted with a status condition. So basically you hit Will-O-Wisp, then hit Hex, and that’s about the most damage output you’re going to get from a single move. Bonus points for the fact that it’s 100% accurate.
If you can’t hit a Will-O-Wisp due to your teammate hitting him with a status or due to the Tera Shield going up, that’s okay – you still have Shadow Ball. Shadow Ball is not ideal, but it can do the trick when necessary.
The issue that you’ll always face with Giratina is not that he’s being hit super effectively, because although he has five type weaknesses (those being Ghost, Dark, Dragon, Ice, and Fairy), he’s tanky enough to take the hit. The real issue is that he’s not outputting enough damage. Giratina against an opponent with high Special Defense (typically 100 or over) and unable to hit Hex, or if he’s type resisted, does not have enough ability to win. He gets close to having enough stats to win, but he just can’t pull it off. As with most of the lower offensive-output Pokémon, you’re going to need to drop probably three Calm Minds to get yourself going; that’s not unusual nor is it bad.
Ghost is, of course, super effective against Psychic and Ghost types, so Giratina makes for a great alternative to Gholdengo when Gholdengo won’t work due to a type weakness. Gholdengo’s weak to Fire, but Giratina resists it, for example.
By the way, we’re not using Giratina Origin Forme because we need to hold the Shell Bell, which is the norm for raiders on this list – after all, how else are you supposed to heal yourself without using a Heal Cheer?

Mew Builds
Mew is unique in the Pokemon series for his ability to learn every single TM move. This allows Mew to adopt a huge variety of unique Tera builds that he steals copies from other Tera raiders. Mew also has some movesets that can use the Stellar Tera type quite successfully, placing him in an exclusive club of raiders.
Lock and Load Mewtwo
Mew @ A Bunch of Stuff (Light Clay and Life Orb viable in some sets, Safety Goggles viable against typical status-inflicting opponents, Shell Bell viable if not running Stored Power)
Ability: Synchronize
Tera Type: Psychic (Stellar optional, but not better than Psychic)
EVs: 252 Sp. Atk/128 Def/128 Sp. Def
Nature: Quiet (other natures are fine so long as they boost Sp. Atk and do not detract from Def or Sp. Def)
Moveset:
- Psychic (Stored Power also optional – see Strategy 1)
- Calm Mind/Amnesia/Iron Defense/Light Screen/Reflect (Amnesia/Iron Defense not optimal unless running Stored Power build, and the screens are helpful for survivability when building stats, but Calm Mind is the best middle-of-the-road option)
- Nasty Plot
- Metal Sound
Bolded moves should have their PP maxed out.
“Lock and load” Mew is a special attacker who builds his own stats with Nasty Plot, debuffs the opponent with Metal Sound, and blasts the opponent away with his attack. Mew should not be used against any Tera Pokemon who would be super effective against Psychic (that is, Ghost, Dark and Bug types). Mew can be successfully used against Tera types that do not resist Psychic (that is, Psychic, Bug and Dark types) as a powerful neutral damage attacker.
Strategy 1:
Like Slowbro, Mew is a “lock and load” special attacker using Stored Power and a lot of buffs and debuffs to build up the power of his Stored Power. The typical Stored Power strategy is as follows:
- Turn 1, 3: Nasty Plot
- Turn 2, 4: Metal Sound or Amnesia
- Turn 5: Stored Power
This schedule is very flexible and raid-dependent. Mew may find it useful to start the raid with a Light Screen, Reflect, Amnesia or Iron Defense to ensure survivability. Stored Power Mews would also gain two stat stages from Amnesia and Iron Defense, but picking the right defense booster requires one to know the type of the move with which they are going to be attacked, and this guide assumes that one doesn’t have knowledge of the opponent’s moveset. I typically play it safe with a Calm Mind if I don’t know which type of attack is coming.
Mew should never use more than two Nasty Plots or Metal Sounds, as the diminishing returns from the stats pales in comparison to the benefit of using one of the second-slot moves listed above. Once you’ve built up enough stats, blast the opponent away with Psychic.
Stored Power Mew works best with a coordinated raid team of teammates who can disperse Heal Cheers and supports to keep Mew alive. It is functional in offline raids but easiest to succeed with in coordinated online raids.
Strategy 2:
Running Psychic instead of Stored Power is vastly less risky, but tends to remove the possibility of a one-hit KO. Psychic sets should hold Shell Bell over Leftovers, as multiple Psychic attacks will be needed, and will happen to refill Mew’s health along the way.
Psychic is basically the same idea as all other “Lock and Load” sets: buff yourself, debuff the opponent, and drop the hammer with Psychic. Psychic strats look like this:
- Turn 1, 3: Nasty Plot
- Turn 2, 4: Metal Sound (Amnesia or Calm Mind are still viable because Mew will be fighting an opponent with his Tera Shield up)
- Turn 5: Psychic
The remainder of the battle would consist of Mew using Psychic, and one or two Nasty Plots after the mid-raid stat wipe to rebuild his power.
Item Strategy:
There are many available items in this Mew set. While the exactly optimal item depends on a variety of factors including the raid opponent, your teammates or lack thereof, your choice of second move and the Tera type of the opponent, these are the items that tend to be most optimal:
- Shell Bell (Psychic sets prefer Shell Bell, but a Stored Power that fails to one-hit KO would also avoid a failed raid by healing to maximum)
- Leftovers (Stored Power sets need Leftovers to avoid dying before completing the stat buildup, but this need is often filled by support players or the Gardevoir NPC)
- Light Clay (Useful if putting up a screen, but remember that the AI will calculate the attack that does the most damage, so if it has a special attack and a physical attack, you might only convince it to use the other one by raising a shield)
- Life Orb (Stored Power sets do 30% more damage with Life Orb, and the downside is only relevant if the one-hit KO fails. However, if the KO fails, you are left very vulnerable with no way to heal. Use carefully.)
- Safety Goggles (Amoonguss)
“Play It By Ear” Mew
Mew @ Shell Bell
Ability: Synchronize
Tera Type: Stellar (Psychic equally viable – Stellar grants a small boost to the lifesteal move, but will do less damage against the Tera Shield)
EVs: 252 Atk/128 Def/128 Sp. Def
Nature: Any nature that boosts Atk
Moveset:
- Psychic Fangs
- Psychic Terrain
- Lifesteal move (Leech Life, Drain Punch are best)
- Bulk Up
Bolded moves should have their PP maxed out.
“Play It By Ear” Mew is a physical attacker Mew that simply boosts his Psychic power with Psychic Terrain, raises his own stats with Bulk Up and attacks as needed, much like how a Koraidon is normally played. Mew should not be used against any Tera Pokemon who would be super effective against Psychic (that is, Ghost, Dark and Bug types). Mew can be successfully used against Tera types that do not resist Psychic (that is, Psychic, Bug and Dark types) as a powerful neutral damage attacker.
Strategy:
- Turn 1: Psychic Terrain/Bulk Up (Bulk Up is more useful for the initial defense boost, but Psychic Terrain survives stat reductions)
- Turn 2: Bulk Up/Psychic Terrain (Use opposite of the move you used first turn)
- Turn 3-End: Psychic Fangs, Lifesteal as needed
The Stellar Tera is useful for this variety of Mew as it does not detract from his defensive capabilities nor the Tera STAB gained for Psychic Fangs, but it does provide a 1.2x Stellar Tera boost to the Lifesteal move. It’s a trade-off as to whether you would prefer him to have the Psychic Tera, which doesn’t suffer the severe damage penalty against Tera Shields or the Stellar Tera, which gives a boost to the lifesteal move. I find Psychic Tera Typing more successful than Stellar Tera Typing.
“Pretend I’m Bellibolt” Mew
Mew @ Metronome
Ability: Synchronize
Tera Type: Should match the attacking move
EVs: 252 Sp. Atk/128 Def/128 Sp. Def
Nature: Any nature boosting a non-Speed stat at the expense of the unused type of attack
Moveset:
- Nasty Plot/Swords Dance (depends on type of attacking move)
- Calm Mind/Bulk Up (depends on type of attacking move)
- “Lifesteal” move (Leech Life, Giga Drain, Drain Punch, etc.)
- Acid Spray/Screech (depends on type of attacking move)
Bolded moves should have their PP maxed out.
Strategy:
Sometimes a Tera Pokemon will have a Flying or Water Tera Type but be a Ground type, and Bellibolt won’t be useable due to the threat of the Ground-type attacks. This is where Mew comes in. Mew should not be used against any Tera Pokemon who would be super effective against Psychic (that is, Ghost, Dark and Bug types). Mew can be successfully used against Tera Types that do not resist the desired attacking type. While this variant of Mew is not as widely successful as Bellibolt, it does have a niche against raiders that Bellibolt can’t reach.
The strategy is very similar to Bellibolt’s basic idea. Use the move appropriate to the category of Lifesteal attack you selected:
- Turn 1: Calm Mind or Bulk Up
- Turn 2: Nasty Plot/Swords Dance
- Turn 3: Acid Spray/Screech
- Turn 4: Begin Lifestealing
Like with the Bellibolt strategy, it is vitally important that Mew does not stop using the lifesteal move once he starts the Metronome chain. Mew can clean up the carnival with minimal difficulty even after a stat wipe so long as he does not break the Metronome chain and Terastallizes appropriately.
Mew’s Tera is worth consideration here, as Mew will go into the raid with a Psychic defensive profile but may change partway through. If Mew is raiding a Tera Psychic Magmortar while Mew is using Leech Life and a Bug Tera, he will become type-vulnerable to Magmortar’s Fire-type attacks after Terastallizing. I encourage raiders with no shortage of Mews to consider making multiple Mews with this subcategory.
Generally Great Tera Raid Builds – DLC
skey from the Pokemon Scarlet and Violet Discord server has posted a very large list of Indigo Disk Tera raiders that I’ll provide in addition to the builds I use, listed here. I haven’t personally tried his builds (except the Vileplume build, which I very strongly recommend as it functions similar to Bellibolt and is for Grass-types), but skey is a reputable Tera Raider and I encourage you to reference his builds!

Ogerpon (Grass-type)
Ogerpon @ Magical Leaf (Shell Bell, Metronome and Big Root are useful for a super self-healing loadout, but Magical Leaf boosts damage on Horn Leech and Ivy Cudgel, giving Ogerpon some discretion in her attacks)
Ability: Defiant (Teal Mask)
Tera Type: Grass (Teal Mask)
EVs: 252 Atk/252 HP/4 Def
Nature: Adamant or Brave
This is a build for Teal Mask Ogerpon. There’s not many great physical attacker Grass raiders, so if you only have one Ogerpon you’re probably better off investing it into Grass and letting other Pokemon cover the other types.
Moveset:
- Ivy Cudgel
- Horn Leech
- Swords Dance
- Grassy Terrain
Strategy:
Ogerpon is your best Grass-type physical attacker. She is a “Play it by Ear” Pokemon whose strategy will look pretty similar to Bellibolt. Ogerpon should not be brought against any Pokemon who is a type that would be super effective against Grass (that is, Poison, Bug, Ice, Flying and Fire) or against a Tera Type that resists Grass (that is, Poison, Bug, Flying, Fire, Grass, Dragon and Steel). Ogerpon’s typing is far more frail than Bellibolt, but he can cover Ground-type niches and neutral damage niches that Bellibolt can’t.
Ogerpon’s strategy is fairly straightforward:
- Turn 1: Swords Dance
- Turn 2: Grassy Terrain
- Turn 3-End: Horn Leech
Ogerpon can perform acceptably well without a Grassy Terrain up, but she does rely on a Swords Dance boost to self-heal faster than she takes damage. After the mid-raid stat wipe, Ogerpon ought to use Swords Dance if not in immediate danger of death to raise her stats again.
Ivy Cudgel is a move often recommended for Ogerpon, but it is only particularly useful if Ogerpon is holding Shell Bell. Ivy Cudgel has 25 base power over Horn Leech, but lacks self-healing. Shell Bell can compensate for the lack of self-healing, but it is less consistently successful than simply holding Magical Seed and spamming Horn Leech a la Bellibolt’s Parabolic Charge.
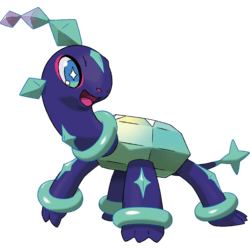
Terapagos
Terapagos @ Shell Bell
Ability: Tera Shift
Tera Type: Stellar
EVs: 252 Def/ 252 Sp. Def/ 4 HP (Alternatively, 128 Def/ 128 Sp. Def/ 252 Sp. Atk)
It should be noted that the first EV setup produces a very tanky Terapagos, who will almost certainly survive to Terastallize. However, he doesn’t produce as much damage output (and self-healing) after he secures the Terastallization. This loadout is preferable when playing online to avoid dying and permanently losing your Tera, but soloing offline with Terapagos should use the riskier second EV setup instead.
Nature: Modest
Moveset:
- Tera Starstorm
- Calm Mind
- Tri Attack (Earth Power, Aura Sphere, Dragon Pulse, Power Gem, Dark Pulse, Flash Cannon, Dazzling Gleam, Energy Ball, Surf, Flamethrower, Thunderbolt, Ice Beam and Bug Buzz are all useful alternatives depending on the Tera type of the opponent. However, Tri Attack receives STAB.)
- Substitute (not required, but helpful when playing on a team with a Support that will heal you)
Bolded moves should have their PP maxed out.
Strategy:
Terapagos is neither a “Play it by Ear” Pokemon nor a “Lock and Load” Pokemon. He is a special attacker reliant on Terastallization. Terapagos should not be brought against any Tera Pokemon who is Fighting-type or has Fighting-type moves. Otherwise Terapagos tends to be functional against every Tera type so long as his choice of secondary attack is appropriate for the situation.
Bulbapedia lists Terapagos’ Terastal Form as a base 95 HP, and that HP only goes up after Terastallization. The issue is that Terapagos is rather frail until he can Terastallize, and Tera Raids don’t allow Terastallization until the Pokemon has landed three attacks on the opponent (minus any thieving of the Tera Orb’s charge). Our goal with Terapagos is therefore to get him Terastallized as fast as possible so he can rain down permanently super-effective Tera Starstorms and ensure that he survives along the way. Understand that if Terapagos dies while Terastallized, it’s game over.
Terapagos should play as follows:
- Turn 1-3: Attacking Move (Use one that is not resisted against the opponent’s Tera type)
- Turn 4: Terastallize and Calm Mind
- Turn 5: Calm Mind
- Turn 6: Tera Starstorm.
Terapagos should make sure that he has two Calm Minds under his belt before using Starstorm, lest he waste the PP. If Tera Starstorm runs out of PP before the battle ends, use your secondary attack to continue to deal damage and self-heal.
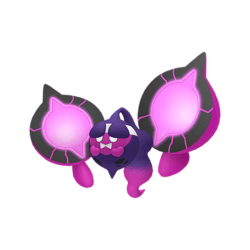
Pecharunt
Pecharunt @ Shell Bell
Ability: Poison Puppeteer
Tera Type: Stellar (Poison is equally viable, but will change your defensive profile. Going from Ghost/Poison to just Poison removes your weakness to Ghost and Dark, but also removes your immunities to Normal and Fighting. Poison doesn’t suffer the damage boost on Tera Shields that Stellar does.)
EVs: 252 Sp. Atk/ 252 Sp. Def/ 4 HP
These EVs are flexible. So long as you have maximum Sp. Atk, allocate between defenses and HP as you see fit. The above EV loadout is designed to cover for Pecharunt’s relative lack of Sp. Def stat compared to his Def stat.
Nature: Modest
Moveset:
- Nasty Plot
- Acid Spray
- Malignant Chain
- Sludge Wave
Bolded moves should have their PP maxed out.
Strategy:
I didn’t expect Pecharunt to be even a semi-decent raider, but it turns out he’s not half bad. Pecharunt is a “Play it by Ear” special attacker who has some elements of “Lock and Load” raid strategy. Pecharunt should never be brought against a Pokemon who has attacks that would be super effective against it (that is, Ground, Ghost, Psychic and Dark attacks). I have said that for every other raider, but it is especially true for Pecharunt. Pecharunt also should never be brought against a type that resists Poison (that is, Poison, Ground, Rock, Ghost and Steel). Otherwise Pecharunt tends to function successfully as a neutral damage attacker with smart raid play.
Pecharunt’s strategy is unique in that it has the Malignant Chain move combined with Poison Puppeteer. Malignant Chain has a 50% chance to poison the target, and Poison Puppeteer causes all targets poisoned by Pecharunt to be confused. Opponents against Pecharunt tend to be confused most of the time, which is vital to surviving a raid. It’s hard to get killed by the Tera Raid Pokemon when it keeps hitting itself in the face.
Pecharunt’s strategy is very flexible, but usually looks like this:
- Turn 1: Acid Spray
- Turn 2: Acid Spray/Nasty Plot
- Turn 3-4: Acid Spray/Nasty Plot as needed until you have two boosts from each
- Turn 5: Malignant Chain or Sludge Wave
This schedule is very loose and some players find it useful to begin by poisoning the opponent with Sludge Wave (save your Malignant Chain PP for later in the raid). That’s a perfectly valid playstyle. The ultimate goal is to keep at least one Nasty Plot boost on Pecharunt and to keep the opponent confused and poisoned at all times. Wise use of attacks will keep Pecharunt pretty healthy, so long as his Sp. Def isn’t debuffed.
Pecharunt’s biggest Achilles’ heel is his teammates. Some teammates proactively inflict status conditions, blocking his ability to poison. Unless you’re playing in a coordinated raid, there’s nothing that you can do about that. Even NPCs will sometimes inflict status conditions.
Non-Attacking Support Pokemon
I don’t spend much time focusing on Support Pokemon, as they’re only truly helpful in online 7-star raids or experimenting with coordinated Turn 1 KOs (Support Pokemon synergize well with Belly Drum builds). It’s generally better to focus on builds that can ensure their own survival with self-healing and stat-raising options. However, sometimes it’s necessary to use a Support Pokemon to curb the worst of the bad teammates you’ll find online.
Support Pokemon are not for beginner raiders: they require much more situational awareness and ability to intelligently act on one’s feet than a normal self-sufficient raider. If you’re not sure whether the Raid Pokemon you’ll be fighting has a better Sp. Def or Def stat, or will attack more with Sp. Atk or Atk, you shouldn’t rush into using a Support Pokemon.
I have only used two Support Pokemon, and only needed these two. Umbreon is by far the better of the two, but Blissey has her uses against Raid Pokemon with no physical attacks.
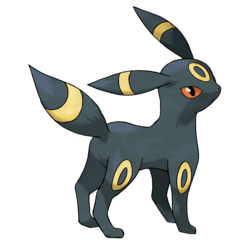
Umbreon
Umbreon @ Many, Many potentially useful items (Light Clay tends to be the best if you’re putting up screens)
Ability: Synchronize or Inner Focus are both functional
Tera Type: Irrelevant
EVs: 252 HP/ 128 Sp. Def/ 128 Def
Nature: Anything that boosts Sp. Def or Def without costing Sp. Def or Def
Moveset:
Umbreon has so many useful moves depending on the raid at hand, you may find it useful to have two different raid builds: one for Sp. Def Raid Pokemon and one for Def Raid Pokemon. Umbreon’s goal isn’t to attack, it’s to buff and protect teammates or debuff the opponent.
- Taunt (necessary for nearly every raid, always include Taunt)
- Screech/Metal Sound (depends on the kind of Raid Pokemon you plan to fight)
- Helping Hand (necessary for nearly every raid, always include Helping Hand for when you see a build commonly used for one-hit KOs; i.e. Iron Hands)
- Reflect/Light Screen/Confuse Ray/Thunder Wave/Yawn/Sand Attack/Fake Tears/Tickle/Moonlight
- Don’t forget that Cheers are an equally valid option – use them!
That last move option is the most difficult choice. Umbreon has so many good moves to pick from that a reasonable choice between all of them can really only come down to what you want out of your Umbreon. If you want an Umbreon that directly supports teammates, use Reflect or Light Screen to keep them alive. If you want an Umbreon that buys your teammates time, go for Confuse Ray, Thunder Wave or Yawn. Alternatively, you may find a Sand Attack, Fake Tears or Tickle useful to lower the opponent’s accuracy or Atk/Def/Sp. Def.
My Umbreon build runs Moonlight, but only because Umbreon otherwise lacks a way to self-heal. Heal Cheers often make up for that, but not all the way. Some Umbreon builds remove Screech and Metal Sound and employ Reflect and Light Screen instead, which is an equally valid build.
Strategy:
Taunt on Turn 1, and otherwise play it by ear. Support Umbreon has to be proactive about preventing damage, not healing damage, so putting up screens or lowering the opponent’s defense for an early KO is key. The best Support Umbreons result in raids that were over before they began.

Blissey
Blissey @ Light Clay
Ability: Healer (Hidden Ability)
Tera Type: Irrelevant
EVs: 252 HP/ 252 Sp. Def/ 4 Def
Nature: Anything that boosts Sp. Def or Def at the expense of Sp. Atk or Atk
Moveset:
- Light Screen
- Life Dew
- Helping Hand
- Heal Pulse
Bolded moves should have their PP maxed out.
Strategy:
Blissey should never be brought against a Pokemon that is a physical attacker. (We’re removing our assumption that we don’t know what moves the opponent has, but just for Blissey). Blissey has great Sp. Def and terrible Def. She will likely die from a single strong physical attack unless she’s at full health. As a result her moveset focuses on Sp. Atk opponents, hence the Light Screen.
Blissey should focus on maintaining a Light Screen at all times. As soon as Light Screen goes down (press Y on the main screen to check its duration) put another one up.
When not putting up Light Screen, Blissey’s sole goal is to be constantly using Life Dew or Heal Pulse to keep teammates at near-max HP, or using Helping Hand to assist with one-hit KO builds. Blissey synergizes very well with Belly Drum builds as she neutralizes the negative effects of Belly Drum and can help with the KOing process. She is otherwise vastly inferior to Umbreon.
Vital Tera Raid Information and Strategies
First, see these Reddit threads for useful introductory information. You’ve probably noticed this information while playing but haven’t seen the full mechanic explained.
Two-Way Typing Strategy
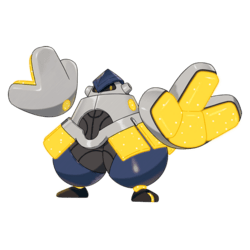
Imagine you’re deciding whether you have a Pokemon build that is appropriate for this raid. You see this screen. Take note of two pieces of information:
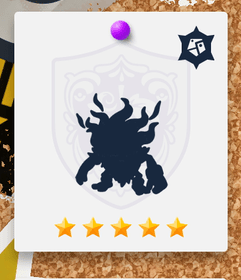
- The silhouette is Annihilape, a Ghost/Fighting dual type. Ghost and Fighting are super effective against Ghost, Psychic, Steel, Rock, Dark, Ice and Normal types.
- The Tera Type is Steel.
Having a Steel Tera Type means that we should only consider bringing Pokemon builds who can attack Steel types super effectively*. That would be Pokemon designed for attacking with Fighting, Ground, or Fire types. Our thoughts immediately turn to using our own Annihilape, who is also Ghost/Fighting. We can use our Annihilape’s Fighting-type attacks to be super effective against the Steel Tera!
*Sometimes a Pokemon that does neutral damage is perfectly fine so long as it’s not weak to the Tera Pokemon, especially in 5-star raids with other competent teammates. Bellibolt would be a good choice here despite doing neutral damage.
Oh, but there’s a problem. The Tera Pokemon is Ghost type, and so too is our Annihilape. If we brought Annihilape, then the Tera Pokemon would be able to hit us with Ghost-type moves, which are super effective against other Ghost types. We would find our Annihilape dying frequently, which would run out the timer and ruin the raid for our teammates.
So what about Terapagos? Terapagos is a Normal type, and he has significant damage output. Annihilape’s Ghost-type attacks can’t hurt Terapagos! And his Tera Starstorm will be guaranteed super effective! Terapagos should work, right?
No. Annihilape is also still a Fighting-type, and would likely have a Fighting-type attack that is super effective against Terapagos, so we can’t bring Terapagos either. It may help us to instead find other Pokemon that are super effective against Steel types, or at least neutral against them like Bellibolt. In this case, Koraidon may be a good fit as he’s not weak to Ghost and Fighting, and is super effective against Steel.
In short, the Tera Raider you choose for this raid needs to:
- Have super-effectiveness against Steel (so that’s Fire, Ground, Fighting or Stellar Tera Blast)
- Be neutral or resistant to Ghost type
- Be neutral or resistant to Fighting type
If you get in the habit of analyzing the type effectiveness for each raid you’ll find that you win raids far more often. All it takes is one moment of consideration to make sure you’re picking the right raider.
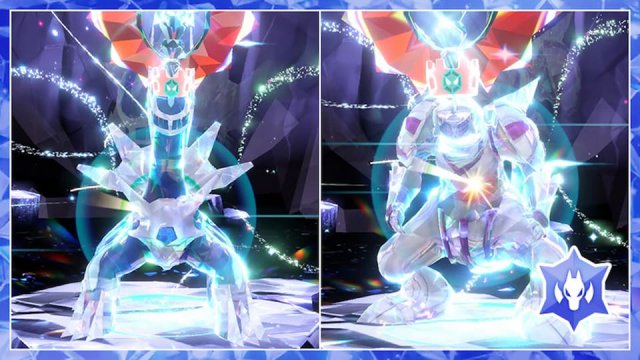
How to Make Your Own Raid Builds
There’s a few important points to understand before building a Pokemon for raiding. I’ll summarize:
- Above all else, avoid dying. Raids tend to fail because the raiders died, not because they failed to do enough damage. I have yet to see an online 6-star raid fail where nobody died, but I’ve seen hundreds that failed because of risky builds and playstyles. Victory in a Tera Raid always comes by taking your time and prolonging your own life.
- Self-healing is key to avoid dying. Most Pokemon just hold Shell Bell and do as much damage as possible to self-heal after their turn or otherwise use a self-healing move for their self-healing mechanism. Raid builds should never be without a reliable and consistent self-healing mechanism.
- Dozens of different Raid Pokemon can be found in raids and can have any Tera Type. The number of possible raid combinations is in the millions, so there is no one-size-fits-all “perfect” loadout. Build an “optimal” loadout that will work in as many raids as possible.
- PP is important. I rarely use attacks that have less than 10 PP because one must spend their PP to acquire a Tera. If your build is reliant on an attack that has less than 10 PP, use a secondary attack first to build PP and self-heal.
- Good enough is often good enough. Many of the raid builds listed on this page are worth creating because they succeed against Tera Types they do neutral damage to. Bellibolt is a great example of a “good enough” raid build.
- One-shotting with “Lock and load” builds is not a worthy goal because they often have a risky success rate with no recourse if it fails. Most one-shot builds take an all-or-nothing gamble (especially Belly Drum) and if the one-shot fails a second chance is rare. Most deaths in online raids come from failed “Lock and load” builds or from a teammate who didn’t take typing into consideration.
There are two main categories of raid builds, and subcategories of each:
- “Lock and load”
- “Play it by ear”
Lock and Load
“Lock and load” builds are builds that are focused on buffing oneself and debuffing one’s opponent until a single hit, executed before the opponent raises their Tera Shield, KOs the opponent. Nasty Plot, Calm Mind, Bulk Up, Screech, Belly Drum and Metal Sound are common moves on Lock and Load Pokemon. Lock and Load Pokemon spend a few turns buffing their own stats, debuffing the Tera Pokemon’s stats and then hit the Tera Pokemon with a single attack that is intended to one-hit KO (or get very close to KOing in one hit) the Tera Pokemon.
It’s important to understand that if a Lock and Load Pokemon fails in its attempt, it likely will never have another chance. Think carefully before using a Lock and Load Pokemon in online raids. They tend to be far more successful in offline raids due to the repeatability of the raid and the absence of sync delay.
Stored Power
One subtype of “Lock and Load” Pokemon are the Stored Power users. A small number of Pokemon have access to stat-changing moves and the Psychic-type attack Stored Power. Stored Power is unique in that its base power increases by 20 for each additional stat change, so using a move like Nasty Plot would not only raise one’s Sp. Atk by two stages (doubling the power of the Sp. Atk stat) but also by raising the base power of Stored Power. Stored Power would originally be a base power of 20, but is now a base power of 60 that is also doubled to achieve a power of 120. That’s a x6 multiplier achieved in a single turn.
Belly Drum
Another subtype of “Lock and Load” Pokemon are the Belly Drum users. Some Pokemon in the above builds list use “Belly Drum”, a move that cuts one’s HP in half and maxes out their Attack stat. I don’t recommend Belly Drum builds for most raids – they’re far too risky, and seem to fail about half the time in 6-star raids. Belly Drums are really only consistently useful with coordinated support in online raids.
Why Belly Drum Is Poorly Thought Out
I’ll use an example that I have witnessed hundreds of times in online raids. This pattern repeats itself with shocking consistency due to the widespread nature of Belly Drum raid builds.
Imagine that a team of 4 online raiders are raiding a 6-star Pokemon. 3 of them are using Belly Drum builds. On Turn 1, they employ Belly Drum. On the Raid Pokemon’s Turn 1, it attacks each of them individually (the Raid Pokemon uses different moves against different people), and manages to KO one Belly Drum user. The timer has now been knocked down several seconds, the teammates are on their own to deal damage, and that player is out for several seconds.
On Turn 2, the other 2 Belly Drum users land their hits. The first user knocks out an impressive portion of HP from the Raid Pokemon, resulting in it putting up its shield. The first user has self-healed with Shell Bell, and is at full health. The second user didn’t do much damage, having been resisted by the Tera Shield that was just put up, so he didn’t self-heal much at all. The third user is still on the respawn timer.
After Turn 2, the Raid Pokemon wipes everyone’s stats because its HP passed the threshold where it must do that. Now nobody has their Attack boost, and the second user is at less than half his HP due to having not healed much.
On Turn 3, we have one Belly Drum user at full health, another one who is heavily damaged and a third one who has just respawned and is at full health. No one is Terastallized, so they can’t effectively self-heal due to the Tera Shield blocking nearly all non-Terastallized damage. Their only option now is to use two attacks to gain Terastallization, Terastallize, and try to hit the Raid Pokemon for enough HP that they can try Belly Drum again.
Due to their inability to self-heal in the short term (the Tera Shield walls their attempts) and the fact that Belly Drum requires losing half of one’s HP, the Belly Drum users continue to try and fail to achieve a Terastallized Belly Drum KO, and keep dying in the process. They run out the timer, and lose the raid.
The moral of the story is that Belly Drum is a poorly-planned way to raid, and if it doesn’t achieve the one-hit KO (which it almost never does in a 6-star raid, but sometimes achieves in a 5-star raid) then it will likely lose in most 6-star raids and some 5-star raids. Belly Drum, in my opinion, is only kept alive by the willingness to lose of the people who raid with it: when they succeed they see it as the obvious outcome, but when they lose they see it as just bad luck and don’t mind the fact that they just wiped the raid for everyone.
Don’t wipe the raid for everyone. Use a better Lock and Load Pokemon.
Play it by Ear
Play it by Ear Pokemon are the freewheeling archetype that have a rough idea of their first few turns, but then make choices based on the circumstances of the raid. Play it by Ear Pokemon often have a loadout patterned like so:
- Attack
- Lifesteal attack/Healing move (often replaced by Shell Bell)
- Stat raising move
The most prominent Play it by Ear Pokemon are Annihilape, Koraidon and Bellibolt. Despite their lack of planning, Play it by Ear Pokemon tend to succeed more often than Lock and Load Pokemon due to their ability to heal themselves without needing to set up stat buffs and debuffs, but their success is still heavily dependent on their ability to deal damage.
Most Play it by Ear Pokemon are already very heavy physical or Special attackers, and equip the Shell Bell to regain HP mid-turn. If you have a high-attacking Pokemon that can boost its own stats but doesn’t have a move that directly heals the user, equip a Shell Bell.
How to Construct a Raid Pokemon Build
- Select archetype of raid build you prefer (Beginners should use Lock and Load and experiment on 5-star raids to understand the mechanics at play)
- Select Pokemon that has the stat changes and attacks in its movepool. Look for moves like Nasty Plot, Calm Mind, Bulk Up, Belly Drum, Screech and Metal Sound to give you an idea of what to look for. Most of these moves are useful regardless of the archetype you aim for. Keep in mind that you do need more than simple debuffing moves to have a useful loadout: debuffs can no longer be applied when the Tera Shield goes up. You should also be using a Pokemon that has the same Tera as its typing, and will be attacking with only that typing.
- Build the Pokemon. After obtaining it in-game, start by applying its moves by “Remembering” the moves and then using TMs to fill in the rest of the moveset. Use experience candies or the “Chansey cave” to level it to 100. (The Chansey cave will also provide excellent EV training in the HP stat, as Chansey gives 3 HP EVs.)
- Next, go to Montenevera and Hyper Train all its stats. Yes, even Speed – the thought process used to be that Speed did not matter, but there are many niche circumstances where it can make or break a raid.
- Then use traditional EV training methods or the definitely-not-steroids medications provided in Chansey Supply (Zinc, Carbos and the like) to raise EVs for the desired stats. Understand that it takes about 50 medications, costing $10,000 each, to max out a Pokemon’s EVs. The Indigo Disk Item Printer makes that cost seem like nothing, but if you can’t afford it then pop some sandwiches and EV train the traditional way. As a general rule, you should max out your attacking stat to 252 and split the remainder between Def. and Sp. Def. This is because your strategy revolves around regaining HP, so it’s better to lose less HP than it is to have more HP to begin with. Of course, if you’re in a situation where you expect to run something like Calm Mind and you have an abysmal Def. stat, you can deviate from that and put everything into Def. because you know your Sp. Def will get boosed from Calm Mind.
- After applying IVs and EVs, use or buy the appropriate Nature mint. Natures boost one stat by 10% and nerf another stat by 10%, and the only stat that can’t be altered is HP, so picking a nature that boost Sp. Atk or Atk at the expense of the unused attack stat is a safe option. Nature mints can be bought at the Chansey Supply in Mesagoza.
- Go to Medali and change the Tera Type of your Pokemon if needed. Completing Indigo Disk’s main story makes obtaining Tera Shards much easier, and completing the Kitakami Pokedex gives you the Tera Charm, boosting the number of Tera Shards obtained after each Tera Raid, so if you’re short on Tera Shards you may need to play the actual game for a bit before starting on raids.
- Finally, buy and equip the item that you desire your Pokemon to hold. Single-use items do respawn after the Tera Raid is over, so only buy one. If you’re having a hard time locating an item, remember that nearly all battle items can be purchased either from the Delibird Presents stores in West Mesagoza (zoom into the map to see which stores are which) or in the Delibird Presents store in North Levincia; the stores do have different stock between cities. Delibird Presents is the store with the red trim out front.
- Optional: apply a mark to your Pokemon to flex on the nerds in online Tera Raid battles.
Testing the Build
Now that your Pokemon build is complete, I encourage you to try beating a 5-star raid offline with it. If you can beat a few 5-star Tera raids with your new build, it’s probably a decent build. Practice with it to understand how it works in the relative chaos of Tera Raids before taking it online.
When Is It a Good Idea to Use the Stellar Tera Type?
The Stellar Tera Type is unique in that it provides a STAB boost to every type of move without changing the defensive profile of the user. It must be a great one-size-fits-all option then, right?
No. Stellar Tera Types suffer by being in the “35%” damage category as described in the Tera Shield damage reduction Reddit thread, linked above. So if you were to run Terapagos, who is a Normal type, and have him Terastallize and use Tera Blast, he’d be using a Stellar-type move when he is typically Normal type. Tera Blast would therefore be subjected to the Tera Shield damage nerf.
Stellar Tera Typing is at best an alternative to having the right super-effective attack available, but shouldn’t be your first choice. Ideally, you’ll have an attacker that is super effective against the Tera Type of the raid already*. As a general rule, only use Stellar Tera Typing when you need to Terastallize without changing your defensive profile (that is, when you’re a dual type with great typing), are using Terapagos, or plan to use two different attacking moves that are each of a different type.
*It’s generally best to have a Tera Raider pre-built so that you can tackle each Tera Typing possible. Bellibolt can cover a solid portion of Raid Pokemon with his neutral damage, but you never know when the opponent may surprise you with Earthquake!
Generally Useful Moves to Consider for Empty Slots
The typical raid build consists of a stat-raising move, a powerful attacking move, a secondary attacking move to build Tera charge if the powerful attacking move has low PP, and a method of self-healing (often with Shell Bell or a lifesteal move like Drain Punch). Sometimes this results in a moveset that leaves open an empty slot. For example, Bellibolt can succeed just fine with Acid Spray, Electric Terrain and Parabolic Charge. His fourth move is up to one’s discretion.
There’s several generally-useful moves that are rarely a make-or-break for any raid build, but are often particularly helpful for use. These moves include but are not limited to:
- Thunder Wave (Paralysis is possibly the best status effect to inflict, as it costs only a single turn to inflict and can potentially cost the opponent multiple turns)
- Yawn
- Will-O-Wisp (people often forget that being burned halves the opponent’s Attack)
- Confuse Ray
- Sand Attack
- Protect (useful for after the mid-raid stat wipe in 6-star raids)
- Life Dew (best suited for raids with human teammates, not NPCs)
- Skill Swap
- Slack Off (best suited for high-HP tank builds)
- Light Screen
- Reflect
- Any opponent-debuffing move, if playing online, besides debuffing the opponent’s Speed
- Terrain moves so long as the terrain does not boost the opponent’s attacks
- Substitute
If you’re ever unsure what to put as the last move on your raid build, scroll through your “Remember Moves” and TM options and see if there’s something here that may be of use.
Held Berries and Damage Calculation
In 7-star raids, and to a lesser extent 6-star raids, the opponent Pokemon is running calculations to see which of its moves will do the most damage against you specifically. If the opponent Pokemon has Ground and Grass attacks, it will calculate which attack will do more damage and hit you with that. If your Pokemon happens to be Flying-type, the opponent Pokemon will hit you with Grass attacks because that’s what will do more damage.
This is demonstrable by using a dual-type Pokemon and Terastallizing it. Suppose I have a Gholdengo, who is Ghost/Steel and weak to Ghost, Dark, Fire and Ground. The opponent is Annihilape, who is Ghost/Fight. Annihilape has Fighting-type attacks it can use, but those attacks are ignored by Ghost. Instead it will usually hit me with the attacks that are the most effective, which would be a Ghost-type attack.
Suppose I Terastallize into a Steel type. Annihilape will stop hitting me with Ghost-type attacks and switch to Fighting-type attacks because it has run its calculations again and finds that that is what is now most damaging against me given my new type.
This can be manipulated.
If I am holding a berry that reduces damage from a specific type of attack, the opponent will take the damage from that berry into account when running its calculations. So let’s suppose that my Terastallized Steel-type Gholdengo is holding a Chople berry, which reduces the damage from a single Fighting-type attack. Annihilape will have to run a calculation to determine whether his Ghost-type attack or Fighting-type attack will do more damage. Since the berry will reduce the damage from a Fighting-type attack, Annihilape might choose to keep using Ghost-type attacks for the rest of the raid so long as it would be more effective than the reduced-damage Fighting-type attack.
This is not 100% consistent, as the opponent Pokemon does sometimes randomly decide to use less-optimal attacks*, but that is less common in higher-star raids and seems to be very rare in 7-star raids. Therefore a crafty raider can use a berry to cover one of his Tera Typing’s weaknesses for a while, until the opponent Pokemon randomly decides to use a non-optimal attack.
*Attacks with a greater chance to critical hit are included in the calculation, and the calculation uses the Expected Value of the likelihood of a critical hit versus a normal hit. There also appears to be a straightforward “x% chance to use the optimal attack, 100-x% chance to use a different attack” chance at all times.
Unique Battle Strategies and Mechanics

The Timing of The Stat Wipe and Tera Shield
During 4+ Star Tera Raids, the opponent Pokemon will put up their shield and occasionally wipe your positive stats. I find that most Tera Raid Pokemon will put up their shield when their HP drops to around 60%, but it’s important to know that each Pokemon has a different timeline when they will put up their shield or wipe stats, and they often do those actions independent of one another.
This mechanic allows for some level of planning. For example, most 6-star Tera Raids will wipe the player’s stats roughly one minute in to the raid. They won’t put up their Tera Shield until either knocked down to half HP or the timer reaches a predetermined time. Wily raiders can estimate how many turns they have left before the Tera Shield goes up to decide whether to build up their Tera with small attacks or whether to establish weather effects, terrains and so on. Tera Shields are often raised at the same time that stat wipes occur, so it’s generally safest to assume they’ll happen together. Once your stats are wiped, they generally don’t get wiped again unless it’s a 7-star raid.
These timelines are consistent across raids. X Pokemon will always put up his shield after his HP crosses Y threshold or the timer crosses Z threshold.
How to Beat the Stat Wipe
Most Tera Raids have a stat wipe partway through the raid in which the Tera Raid Pokemon removes all negative effects from itself (keeping any stat raises it has) and removes all positive effects from the players (keeping any lowered stats that you have). Bear in mind that these are technically two separately-timed events, but they often happen at the same time out of coincidence. When the negative effects are wiped, that includes:
- Lowered stats
- All status effects afflicted on the opponent, including confusion
- Taunt
When your positive effects are wiped, that includes your own raised stats (and I believe your cheers as well). Notably, it does not include:
- Terrains on the field
- Metronome charges
- Charge from abilities like Electromorphosis
It’s important to understand what exactly is removed because if you predict that a stat wipe is coming, you can invest your turn into setting up a terrain or a charge. Top-level Bellibolt raiders often place down an Electric Terrain on the turn before the stat wipe to maintain the 50% attack boost to their Parabolic Charge. Alternatively, if they were prepared, they simply powered through it with an already high Metronome boost.
Benefits to Offline Raids
In my experience, it’s actually easier to raid offline than online. The only real benefit to raiding online is the possibility of having teammates that pull their own weight, but those teammates tend to be rare. Fortunately, the NPC teammates that are auto-generated seem to be pretty effective especially after the Indigo Disk DLC.
NPC teammates:
- Do not cut down the clock when they die (but also will not attack unless you’re alive to attack that turn)
- Use a Defense cheer at the start of every raid they’re in
- Sometimes bring Arboliva, whose Seed Sower ability will maintain Grass Terrain and replenish some of your HP each turn, or Gardevoir who will use Life Dew periodically
- Sometimes bring “Intimidate” Pokemon, who invalidate many physical opponents. This is key to farming some 7-star raids offline, like the Cinderace and Blaziken raids
- Rarely cause a Tera Shield to raise before your “Lock and Load” strategy is completed
If you’re having a hard time beating a 7-star Tera Raid and suspect your teammates are at fault, try using NPC teammates.
The Role of Status Effects
Recall that status effects cannot be inflicted against a Raid Pokemon with a raised Tera Shield unless the effect is the result of a move making contact with the Raid Pokemon i.e. Malignant Chain causing poison.
Unfortunately, inflicting status effects on the opponent rarely play a major role in how your raid will pan out. A Raid Pokemon will be able to put up their shield, reduce stats, etc. no matter their status condition, and those effects tend to get removed rather quickly anyway. Status effects sometimes have a use. Were I to rank the useful status effects in order of usefulness, I would rank them accordingly.
- Paralysis/Confusion
- Sleep
- Burn
- Freeze
- Poison
Taunt isn’t technically a status effect, but if it were it would be more effective than Paralysis.
Paralysis is by far the most useful of the effects*, causing the Raid Pokemon to only attack half as often on average. While this does tend to cause the schedule of the raid to go a bit haywire in online raids (as the game will only sometimes tell you that the opponent is paralyzed, which gets very confusing) it does immensely benefit the team. Paralysis prevents the Tera Raid Pokemon from attacking all the time, giving you occasional spots of breathing room to self-heal and knock down its HP.
*Confusion and Paralysis are similar in effect, but Confusion is technically more effective in the short-term. Both are removed in the negative effects wipe.
I did not include Thunder Wave or similar moves on most of these raid builds, and that’s because I couldn’t find a place for them to belong. That isn’t to say that Thunder Wave is unhelpful – quite the opposite – but simply that raids are so focused on dealing as much damage as possible for self-healing that the benefit from inflicting status effects is often smaller than the benefit of using that turn to self-heal again. If you’re conflicted over a fourth move to include in your raid build, Thunder Wave is not a bad choice overall.
Sleep/Freeze is far riskier than paralysis, as it runs the chance of the target immediately waking up from sleep. Inducing sleep is very difficult given the lack of reliable sleep-inducing moves that overlap with reliably good Tera Raiders. Freeze runs a similar risk and can also be undone by Fire-type contact attacks.
Burn is useful not for its damaging effects but because it halves the opponent’s physical Attack. Will-O-Wisp is common for Fire types and worth packing if you happen to be hit with physical moves often.
Coordinated raids can and should make much better use of status effects. Using a protection move like Wide Guard at the same time that another teammate uses Thunder Wave can result in highly effective deployment of status effects. However, as with normal Tera Raids, one must weigh the benefit of inflicting a status move that will soon be removed against the benefit of another self-heal to ensure one’s survival for another turn.
Compensating for Bad Online Teammates
Often when joining a 6-star raid, you’ll find that your teammates will use the same few Pokemon whether they’re appropriate for the raid or not. When Scarlet and Violet first released, Belly Drum builds were extremely popular thanks to the easy availability of Iron Hands and Azumarill, and the fact that the first 7-star Tera Raid could be easily beaten with a Belly Drum Azumarill loadout. To this day, online teammates still use the same few raid builds they made years ago and fail horrendously as a result.
There’s a few ways to counter a bad teammate:
- When the bad teammate respawns, use a Defense! cheer. Cheers don’t seem to interrupt Metronome-based boosts. The Defense cheer will prevent them from dying as quickly as they did last time, and will make it less likely that they’ll die when they invariably reattempt a Belly Drum KO.
- If you notice their Pokemon is weak to the Tera Pokemon, try a Support Pokemon. Prioritize keeping that specific teammate alive to make up for their type weakness.
- Use indirect assistance like terrains and inflicting Sleep, Freeze or Paralysis on the opponent. Terrains (particularly Grassy Terrain) can be useful for healing the team, reducing the damage taken from certain kinds of moves, preventing sleep or increasing the damage the bad teammate will do in the hopes they’ll heal more from Shell Bell. Status effects that shut down the opponent can buy time for the good teammates to move forward with their raid strategies.

why brave nature on bellibolt or hardy nature on armarouge?
LikeLike
Editing error! Thanks for catching that
LikeLike